Syncing Configuration from patientNOW to myAppointmentNOW
patientNOW and myAppointmentNOW share the configuration for many areas, so that information is identical in both places. This is the last step in syncing the configuration items. For additional information, check out Configuring myAppointmentNOW .
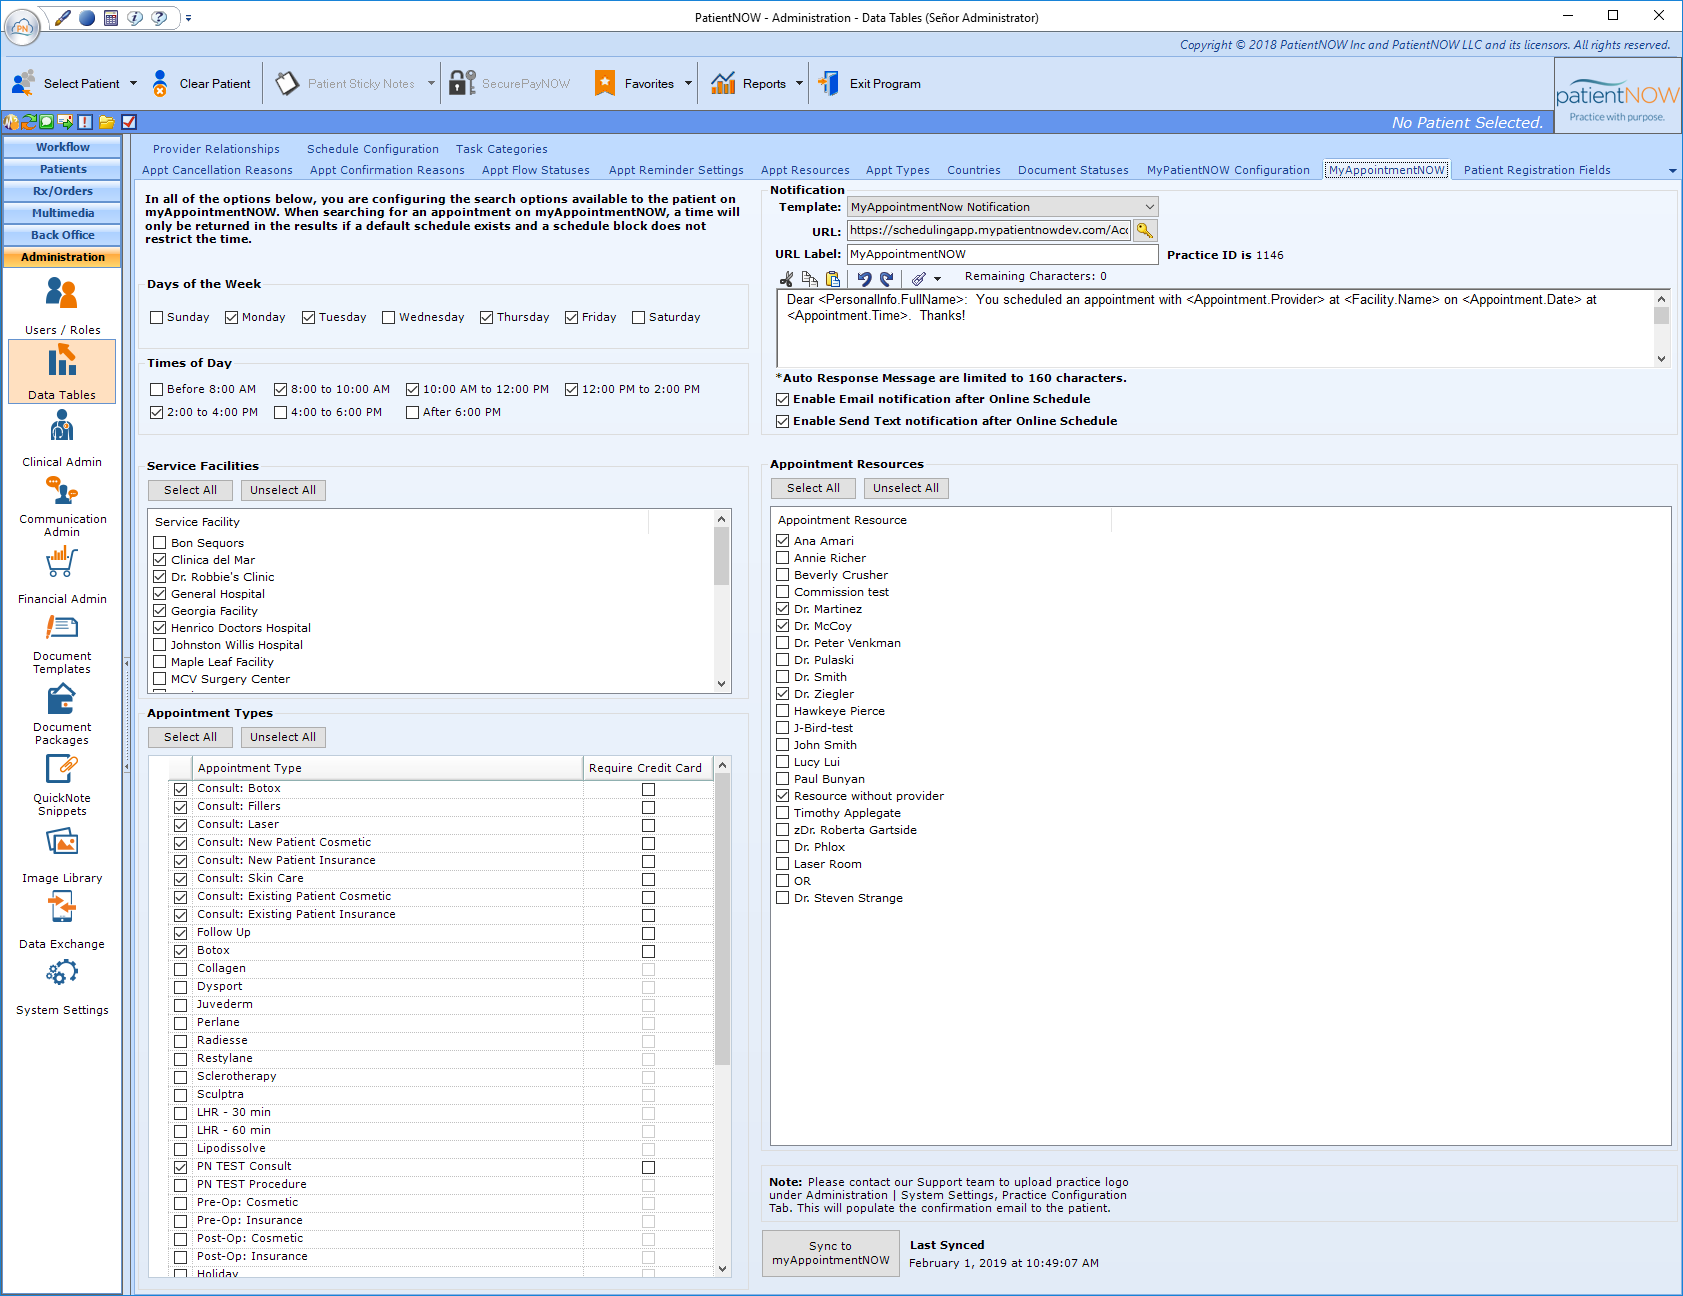
Warning: In all of the selections below, you are configuring the options available to the patient on myAppointmentNOW. These will NOT configure your schedule in the office. If a Schedule Block configuration is different than the selections below, the patient will only be presented the options based on the schedule block.
Selecting Online Schedule Configuration
Days of the Week
This should be the days that you wish to allow patients to schedule. If you are open Monday through Friday, but have Thursday and Friday surgery days, so you don't want patients to schedule on those days, you would check Monday, Tuesday, and Wednesday.
Times of Day
This should be the times of day that you wish to allow patients to schedule. If you have office hours Monday, Tuesday, and Wednesday from 8:00 to 5:00, but you take a lunch from 12:00 to 1:30, you would check 8:00 to 10:00 AM, 10:00 AM to 12:00 PM, and 2:00 to 4:00.
Service Facilities
Select the facilities where patients may schedule themselves online. Usually, this is just your office locations. Generally, you will not check hospitals and surgery centers.
Appointment Types
Perhaps you want to talk with patients before they schedule a surgery consult in order to qualify them, but you are fine allowing patients to schedule their own Botox treatments. You will control this by selecting only the Appointment Types the patient may schedule online.
Appointment Resources
Select the Resource(s) with whom you wish to allow the patient to schedule online. Note: In general, you will only include resources that are "People".
Notify Patient of Scheduled Appointment
As soon as a patient completes and online appointment, they may be notified by myAppointmentNOW. You may select the options to Enable Email notification after Online Schedule and/or Enable Text Page notification after Online Schedule.
Enable Email notification after Online Schedule
If you select this option, you will need to select the Email template under the Template pull-down.
Enable Text notification after Online Schedule
If you select this option, you must configure the text in the window below URL Label. Warning: These notifications are limited to 160 characters.
Syncing Configuration to myAppointmentNOW
Once you have completed configuration, you may select the Sync button. patientNOW will pass all of the configuration items to myAppointmentNOW and update the date and time under Last Synced.
Warning: If you change schedule configuration or any other options on this tab, you must select the Sync button to make sure that myAppointmentNOW stays current with the changes.
